How to Prepare an OBD2 Adapter to Work with the XDiag App
Introduction
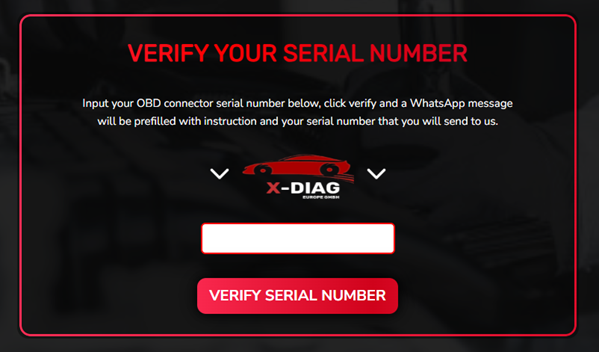
If you’re planning to use the XDiag App, simply purchasing a compatible OBD2 adapter is not always enough.
Many diagnostic interfaces require additional preparation before they can communicate correctly with the XDiag platform. Depending on the adapter model, this may involve compatibility verification, testing, and flashing the appropriate XDiag boot files.
In this guide, we’ll explain the process of preparing an OBD2 adapter for use with XDiag and the steps you should take before purchasing an activation.
Step 1: Verify Adapter Compatibility
Before doing anything else, you should verify whether your OBD2 adapter is compatible with XDiag.
Not every diagnostic interface can be used with the XDiag platform.
Compatibility can depend on:
- Hardware version
- Device model
- Firmware version
- Serial number structure
- Internal chipset and bootloader
Because of these differences, two adapters that look identical externally may not have the same compatibility.
Check Compatibility First
Before purchasing an XDiag license or attempting any modifications, always verify compatibility through our website.
This is the safest way to determine whether your adapter can be prepared for XDiag.
Step 2: Perform an XDiag EOBD Test
To confirm compatibility, we offer an XDiag EOBD Test.
This test helps identify:
- Adapter hardware information
- Firmware details
- Compatibility status
- Conversion eligibility
The EOBD Test is one of the most important steps in the preparation process and should be completed before purchasing an activation.
By performing the test first, you can avoid compatibility issues and unnecessary expenses.

Step 3: Flash the Adapter with XDiag Boot Files
Once compatibility has been confirmed, the adapter must be prepared to work within the XDiag ecosystem.
This requires flashing the device with the appropriate XDiag boot files.
The boot files are responsible for enabling communication between the adapter and the XDiag App.
Without the correct boot configuration, the adapter may:
- Fail to connect
- Not activate properly
- Experience communication issues
- Be unable to work with XDiag software
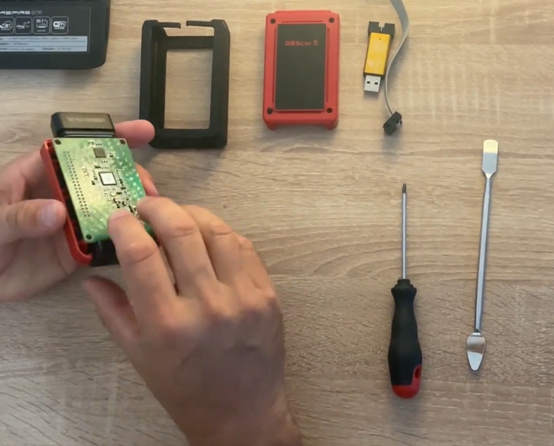
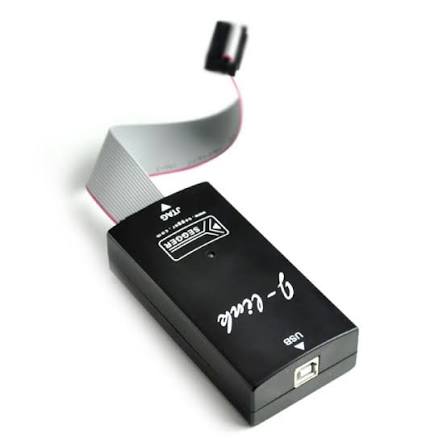
Step 4: Use a J-Link Programmer
To install the XDiag boot files, a J-Link programmer is required.
The J-Link programmer allows access to the adapter’s memory and is used to write the necessary boot files.
This process is commonly referred to as:
- Device flashing
- Boot programming
- Firmware preparation
The exact procedure depends on the adapter model and hardware revision.
Why Is Flashing Necessary?
Many users ask why a compatible adapter still needs to be flashed.
The reason is that XDiag relies on specific boot configurations and authentication methods.
Even if a device is physically compatible, it may not communicate correctly with XDiag until the proper boot files have been installed.
Flashing ensures:
- Correct communication with XDiag
- Stable operation
- Proper activation
- Full compatibility with supported functions
Commonly Supported Adapter Types
Depending on hardware compatibility, XDiag may support various professional diagnostic interfaces.
However, support is always determined by:
- Device compatibility
- Successful EOBD verification
- Correct boot file installation
This is why compatibility should always be confirmed before purchasing any software activation.
Common Mistakes to Avoid
Purchasing an Activation Before Testing
Always perform the compatibility check and EOBD Test first.
Assuming All Adapters Are Compatible
Many adapters look identical but use different hardware internally.
Skipping the Flashing Process
A compatible adapter may still require XDiag boot files before it can function correctly.
Using Incorrect Boot Files
Installing the wrong files can cause activation and communication problems.
Benefits of Using XDiag
Once properly prepared, your adapter can take advantage of the powerful features offered by the XDiag platform, including:
- Full system diagnostics
- Live data monitoring
- Active Tests
- Service functions
- ECU adaptations
- Coding functions (vehicle dependent)
- Multi-brand vehicle coverage
This makes XDiag an attractive solution for workshops, mobile technicians, and advanced automotive enthusiasts.
Conclusion
Preparing an OBD2 adapter for the XDiag App involves more than simply installing the software.
Preparation Checklist
✅ Verify compatibility on our website
✅ Complete the XDiag EOBD Test
✅ Confirm your adapter is supported
✅ Flash the adapter with XDiag boot files
✅ Use a J-Link programmer for programming
✅ Activate and start using XDiag
Following these steps ensures that your adapter is properly configured and ready to deliver a stable and reliable XDiag diagnostic experience.